astrosean
Full Member
 Jack and Jill
Posts: 50
|
Post by astrosean on Dec 16, 2010 16:36:26 GMT -5
This is a condensed version of the build of my own 6" f15 Refractor named Jill based around an Istar achromat. I have used the scope for the past 8 months or so and it is a joy to use. I can't say enough about the quality of the images this scope produces, they speak for themselves! A note about myself, I have a small collection of power tools in my basement, mostly from Sears and Menards. I am in no way a trained machinist so if you are looking for precision, well, keep looking! I do have a lot of building and tinkering experience, I have always preferred to build and modify my own stuff and all of my scopes save a C102HD have been built by me. I like to use unusual/found/recycled materials, mostly because I am cheap and I hate to see stuff get thrown away! 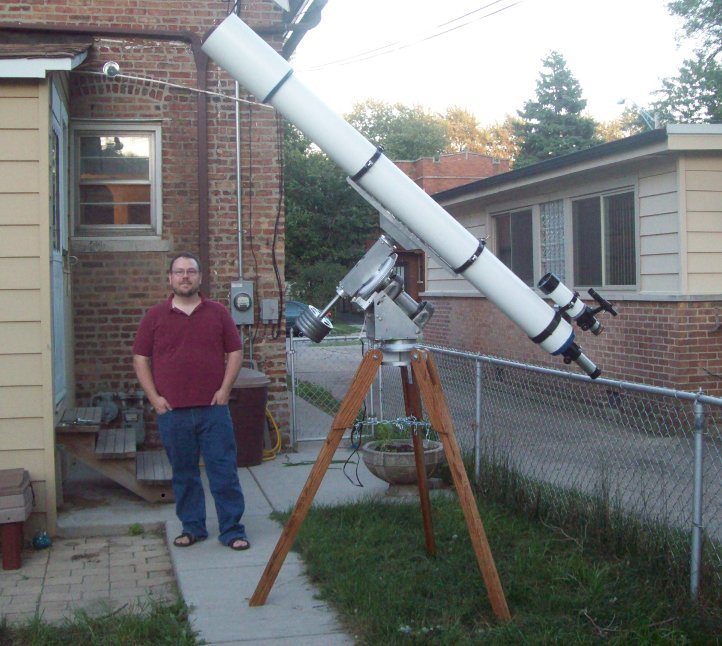 Attachments:
|
|
|
|
astrosean
Full Member
Jack and Jill
Posts: 50
|
Post by astrosean on Dec 16, 2010 16:59:56 GMT -5
I purchased a tube from Hastings Irrigation, found a focuser off Amart and started to collect materials. I am a Chef by trade and every year we replace our cutting boards. Cutting boards are made out of Delrin or HDPE, both of which machine really well and are very nice to work with. Their only downside is that paint or glue will not stick to them no matter what! I cut out a bunch of circles with my router and a circle cutting jig. I ended up with 2 donuts to make the objective cell and two discs to create the focuser plate and collimation assembly.  I found the HDPE to be a bit soft for mounting the cell to, so I added Aluminum mounting plates which ensured precise collimation 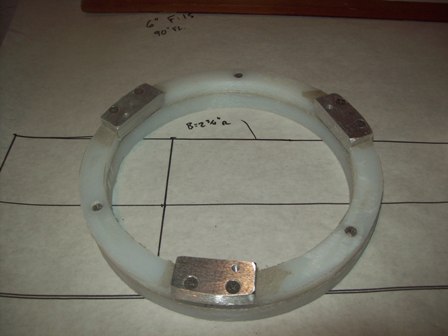 |
|
astrosean
Full Member
Jack and Jill
Posts: 50
|
Post by astrosean on Dec 16, 2010 17:05:24 GMT -5
I drew a full size plan of the optical path and set the baffles at 12" apart for a total of 7 baffles not including the back plate or focuser baffle. You can never have enough baffles. I cut baffles out of pressboard, shelf backing sheets from some IKEA bookshelves we put together for the kids. I sanded the interior edge of each bevel to a knife edge. Originally I tried to use a 45deg router bit but that was too much for the press board and I ended up with a "furry edge" As it turned out the sanding did as nice of a job for about the same amount of time invested. 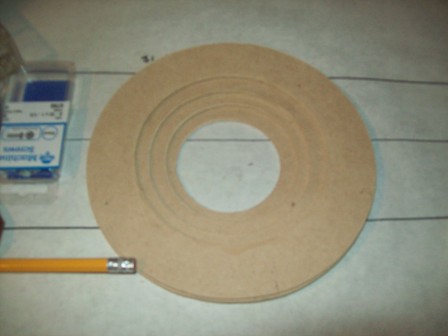 |
|
astrosean
Full Member
Jack and Jill
Posts: 50
|
Post by astrosean on Dec 16, 2010 17:08:30 GMT -5
I cut a bunch of spacer tubes from a closet shoe organizer my wife never used for 21 tubes. 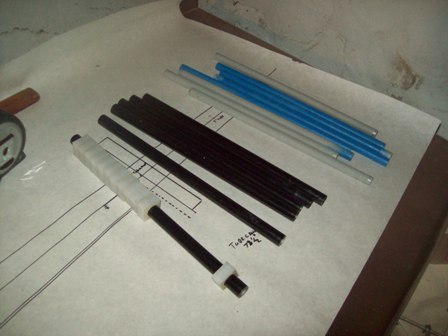 I cut and drilled 21 mounting tabs out of cutting board 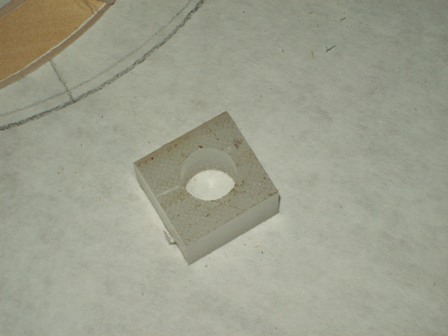 and after some shaping and sanding... 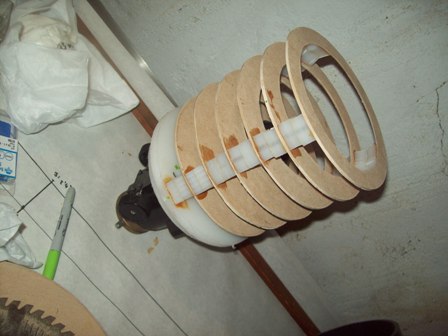 I had a stack of aligned baffles. |
|
gord
Full Member
Posts: 82
|
Post by gord on Dec 17, 2010 16:20:08 GMT -5
Great build Sean! I love watching these projects take shape. And yours was a BIG one (when you consider the work in that mount)! I'm to chicken to attempt a project that involved (even though I would love to).
Clear skies,
-Gord
|
|
astrosean
Full Member
Jack and Jill
Posts: 50
|
Post by astrosean on Dec 21, 2010 19:59:21 GMT -5
Everything put together: 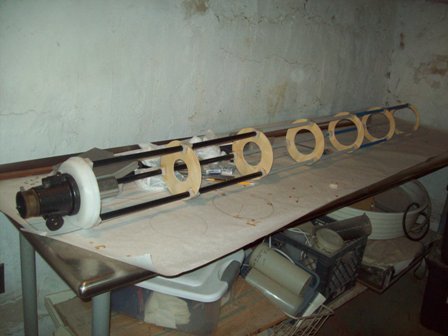 A bit more sanding and gluing and I painted everything internal flat black. At this point my Camera went on the fritz and it was a fair amount of time before I was able to post photos again... |
|
astrosean
Full Member
Jack and Jill
Posts: 50
|
Post by astrosean on Dec 21, 2010 20:08:52 GMT -5
Here are some shots of the assembled tube... First the focuser with collimation plate. Even though a long-focus objective is very forgiving, my building skills(or lack thereof) are not. It's best to have everything as adjustable as possible. Sure enough having the objective cell collimatable as well as the focuser made alignment a breeze. At one point I stored the objective separately and remounted it wrong. There was a definite drop off in planetary detail. 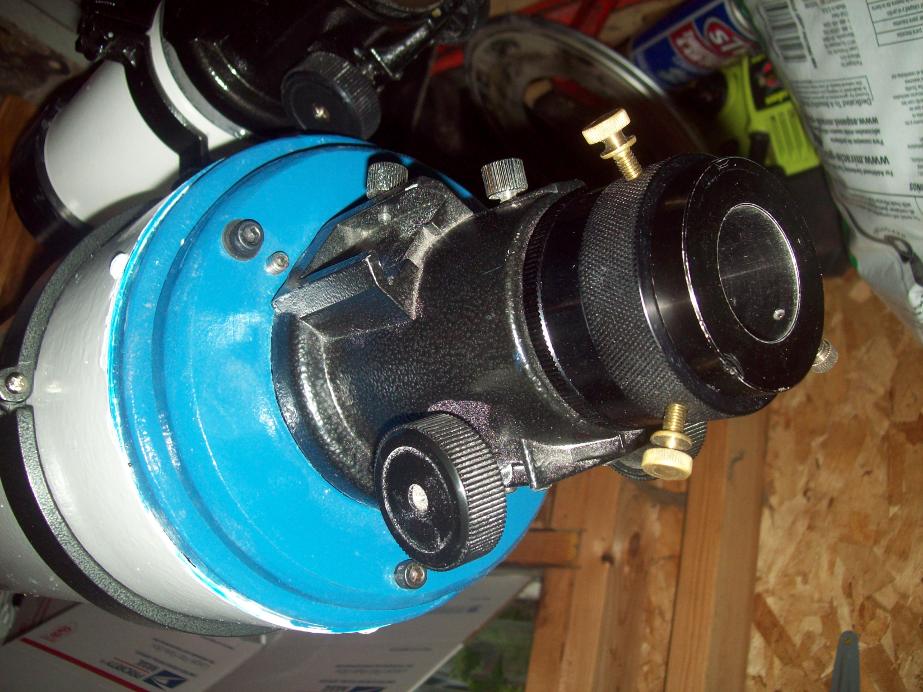 Here is the objective and mounting ring... 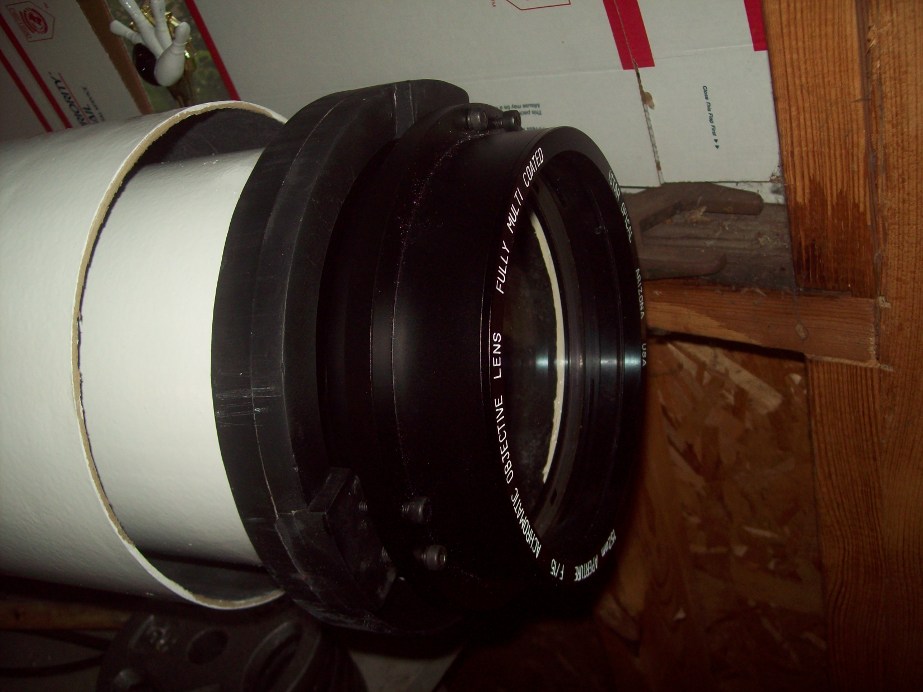 Building the OTA was a fairly straightforward process. painting everything was the hardest part. I pounded out all the dings, filled the dents with Bondo and sanded for an entire weekend. I put on 3 coats of oil-based enamel and religiously rotated the tube during drying. Two days later I realized that oil paint takes a LONG time to dry, I sanded and repainted everything a month later and let the new coat cure in a hot garage for a month and that made a great difference as the finish is smooth and consistent with no fingerprints and only a couple of runs! |
|
|
|
Post by Watcher3 on Dec 21, 2010 23:01:45 GMT -5
Hi Sean. I'm really hoping to do at least some of the work on my 6" F/5. For my 4" Carton, all I did, basically, was to tell Dan, at Crawmach, what I wanted it to look like.
Was that 7" tubing you got from Hastings? Did you have it cut to to your exact length? And finally, how is the quality of the tubing? I realize it will take some work to get a good finish, but did you have any problem with it being off round?
God, I wish I had half the ability and ingenuity of some of you guys!
|
|
astrosean
Full Member
Jack and Jill
Posts: 50
|
Post by astrosean on Dec 22, 2010 10:52:45 GMT -5
That is a Hastings tube. This was the first time I used them. The tube and shipping cost $90 and when it arrived, there were a good number of small dings. It was packaged minimally, in a cardboard box capped by plywood. The dings were easy to remove, I used the focuser plate as a plug and pushed it through the tube, that pushed up most of the dings. You could see the deformation spots in the light so I filled those with bondo and sanded the tube so it was nice and straight. That sounds like a lot of work but it took about a day's work total and was one of the more satisfying parts of the build.
What I didn't like about the Hastings tube was the seam. Because a Hastings tube is rolled from a flat sheet, there is a welded seam that is very difficult to fill and sand down. I made a conscious effort to have the seam on the bottom of the tube so you couldn't see it.
The tube was out of round by about 1/8". once the objective ring and focuser plate was pressed in, the tube rounded out.
I did trim about 8" off the 7' tube(about 2" too much) so straight-thru I have to use an extension. I did the cut by hand with a hacksaw, again, not as hard as you think. I followed Wes James' procedure of wrapping the tube with a few layers of paper to get a straight line, scribing with a thin sharpie and hack-sawing in light passes concentrically around the tube. In the end, my cut end had a better finish than the Hastings cut end!
Thanks for the kind words!
Sean
|
|
|
|
Post by galileo on Feb 15, 2015 15:07:25 GMT -5
Great build Sean, thanks for posting, look for my build thread coming soon.
|
|


